Jan Kudlicka

Upgrading Linux On DeX Containers to Ubuntu 18.04
This guide explains how to upgrade a Linux on DeX container running Ubuntu 16.04 to Ubuntu 18.04.
Step-by-step guide
-
First of all, backup the container (the filename and its location is shown above the orange Run button in the application’s user interface).
-
Make sure you have enough space left for the upgrade. Edit the container properties (by clicking the Edit button) and increase the storage space with a few GB.
-
Launch the container, open a terminal, run
sudo bash(the password is secret), and then run the following (as root):cp -a /etc/init.d/init_container.sh /etc/init.d/init_container.sh.origEdit
/etc/init.d/init_container.shand changeTERM) #lxd_setup_mount_table lxd_run_services lxd_set_timezone $4 sudo -u dextop screen -dmS bgSessionToKeepDevPts0Alive sudo -i -u dextop setsid /bin/bash --login >/devro/tty1 2>&1 < /devro/tty1 ;;to
   TERM)
        TERM=linux setsid /bin/bash >/devro/tty1 2>&1 </devro/tty1
        ;;
Note: Do not omit setting the terminal type, there are some rendering problems when editing files in
nanoorviusing the default terminal type (xterm-256colors). There are some minor issues when using linux too, but it works much better (and well enough to do the upgrade).Once the file is saved, you can shut down the container.
-
Launch the container in the terminal mode (click the Terminal mode button instead of the Run button). You should get a root shell immediately. (If not, double-check the changes you have made to
init_container.sh.)Run the following commands:
mkdir -p /usr/local/lib/aarch64-linux-gnu/
cp -a /lib/aarch64-linux-gnu/libaudit.so.1.0.0 /usr/local/lib/aarch64-linux-gnu/
ln -s /usr/local/lib/aarch64-linux-gnu/libaudit.so.1.0.0 /usr/local/lib/aarch64-linux-gnu/libaudit.so.1
cp -a /usr/lib/aarch64-linux-gnu/libXfont.so.1.4.1 /usr/local/lib/aarch64-linux-gnu/
ln -s /usr/local/lib/aarch64-linux-gnu/libXfont.so.1.4.1 /usr/local/lib/aarch64-linux-gnu/libXfont.so.1
ldconfig
Note: We will keep the current
libaudit.so.1and use it instead of Ubuntu 18.04’s one that does not play nicely with the Android kernel (see also the troubleshooting section below). We need to keeplibXfont.so.1too as it is used by/opt/linux_on_dex/usr/bin/Xtightvnc(Ubuntu 18.04 has onlylibXfont.so.2).The
linux-on-dexpackage is one of the two external packages from Samsung. This package has some serious issues (e.g. files in /tmp) and can cause a severe headache when upgrading. We will remove the package entry from the dpkg database but we will keep the files. This is not the best solution, but since Samsung has also added other files directly (without packages) and even overwritten some files installed from Ubuntu’s packages, I am quite ok with this dirty hack.Edit
/var/lib/dpkg/status, search forlinux-on-dexand remove its entry, i.e., remove the following lines (including the empty line at the bottom):Package: linux-on-dex Essential: yes Status: install ok installed Priority: important Section: admin Installed-Size: 2287 Maintainer: Samsung Linux-on-DeX Team <linux-on-dex@samsung.com> Architecture: arm64 Version: 0.2.6 Depends: pulseaudio, tightvncserver, libaudit1 Pre-Depends: passwd Conffiles: /etc/LoDVersion 2b299d55df536e1372dfb3580450abe1 /etc/init.d/init_container.sh e061eb44ed156db609c7961a7284afec /etc/init.d/vnc.sh 2997931602b651ffa09ec191af2f441b Description: Linux on DeX for Ubuntu Homepage: http://www.samsung.comBefore you save the file, make sure that there is exactly one empty line between the previous package entry and the next one.
-
It’s time to do the release upgrade:
export PAGER=less
export RELEASE_UPGRADER_NO_SCREEN=1
do-release-upgrade
Note: Don’t skip setting the
PAGER;moredoes not work correctly in the terminal mode.Ignore all warnings and errors that do not cause the upgrade program to give up. The upgrader will ask a few times about locally modified configuration files (e.g.
/etc/bash.bashrc,/etc/pulse/default.pa,/etc/ssh/sshd_configand/etc/rsyslog.d/50-default.conf): keep the current versions. When asked about the keyboard configuration and about gdm3, go with the preselected choices.See the troubleshooting section below if the upgrade process gets aborted.
Close to the end of the upgrade you will see the following message:
Errors were encountered while processing:
 makedev
 dnsmasq-base
 lxd
Exception during pm.DoInstall():  E:Sub-process /usr/bin/dpkg returned an error code (1)

*** Send problem report to the developers?

After the problem report has been sent, please fill out the form in the
automatically opened web browser.

What would you like to do? Your options are:
  S: Send report (826.4 KB)
  V: View report
  K: Keep report file for sending later or copying to somewhere else
  I: Cancel and ignore future crashes of this program version
  C: Cancel
Please choose (S/V/K/I/C):
Press C (cancel). Right after you will see yet another similar message:
*** Send problem report to the developers?

After the problem report has been sent, please fill out the form in the
automatically opened web browser.

What would you like to do? Your options are:
  S: Send report (925.1 KB)
  V: View report
  K: Keep report file for sending later or copying to somewhere else
  I: Cancel and ignore future crashes of this program version
  C: Cancel
Please choose (S/V/K/I/C):
Press C again. After that the upgrader finishes:
Errors were encountered while processing:
 makedev

Upgrade complete

The upgrade has completed but there were errors during the upgrade
process.

To continue please press [ENTER]
Press Enter. Next, remove the
makedevpackage:apt remove makedevand remove the packages that are no loger used as well as the crash reports:
apt autoremove
rm /var/crash/*
We are almost done. Exit the shell.
-
Launch the container in the terminal mode again. Run
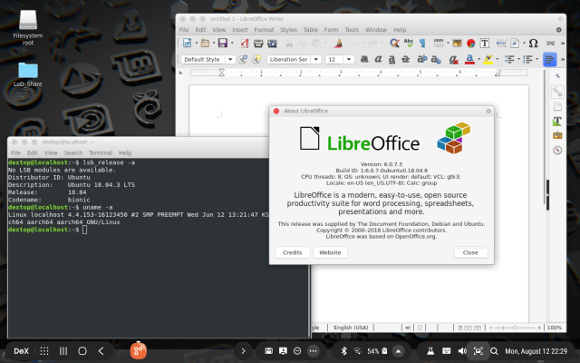
lsb_release -aand check that the installed version is 18.04.
You can also run
apt updateandapt upgradeto make sure that there are no remaining problems with the packages and everything is up-to-date. -
We need to make some fixes to VNC to be able to run the container in the desktop mode. There are several options how to do that, I think the simplest one is the following:
Edit
/usr/bin/vncserver(this file is not a part of any package so we don’t need to worry about the file being overwritten later), find the following line (it should be line no. 238):$cmd = "Xtightvnc :$displayNumber";and change it to:
$cmd = "/opt/linux_on_dex/usr/bin/Xtightvnc :$displayNumber";Save the file and try to run:
/etc/init.d/vnc.sh 1280x800 96You should see the following message:
New 'X' desktop is localhost:1

Starting applications specified in /home/dextop/.vnc/xstartup
Log file is /home/dextop/.vnc/localhost:1.log
Shut down the container.
-
Run the container in the desktop mode (by clicking the Run button). You should see your desktop.
You might want to restore
/etc/init.d/init_container.sh(so that the terminal mode runs a shell as the dextop user instead of the root user). In a terminal window, runsudo bashand then run the following command as root:mv /etc/init.d/init_container.sh.orig /etc/init.d/init_container.sh -
Enjoy Ubuntu 18.04 LTS running on your Samsung phone or tablet :)
Troubleshooting
-
If running
sudoexits with the following errors:sudo: unable to open audit system: Permission denied sudo: pam_open_session: System error sudo: policy plugin failed session initializationYou are using Ubuntu 18.04’s
libaudit.so.1library. Make sure that you have copied the original library to/usr/local/lib/aarch64-linux-gnu/and runldconfig. You might want to useldconfig -vand check the output to verify that the library was found. -
If the upgrader aborts prematurely:
Run
lsb_release -ato confirm that the version is already 18.04. If so, continue the upgrade by runningapt upgrademultiple times until there are 0 package to upgrade. Runapt dist-upgradeafterwards.